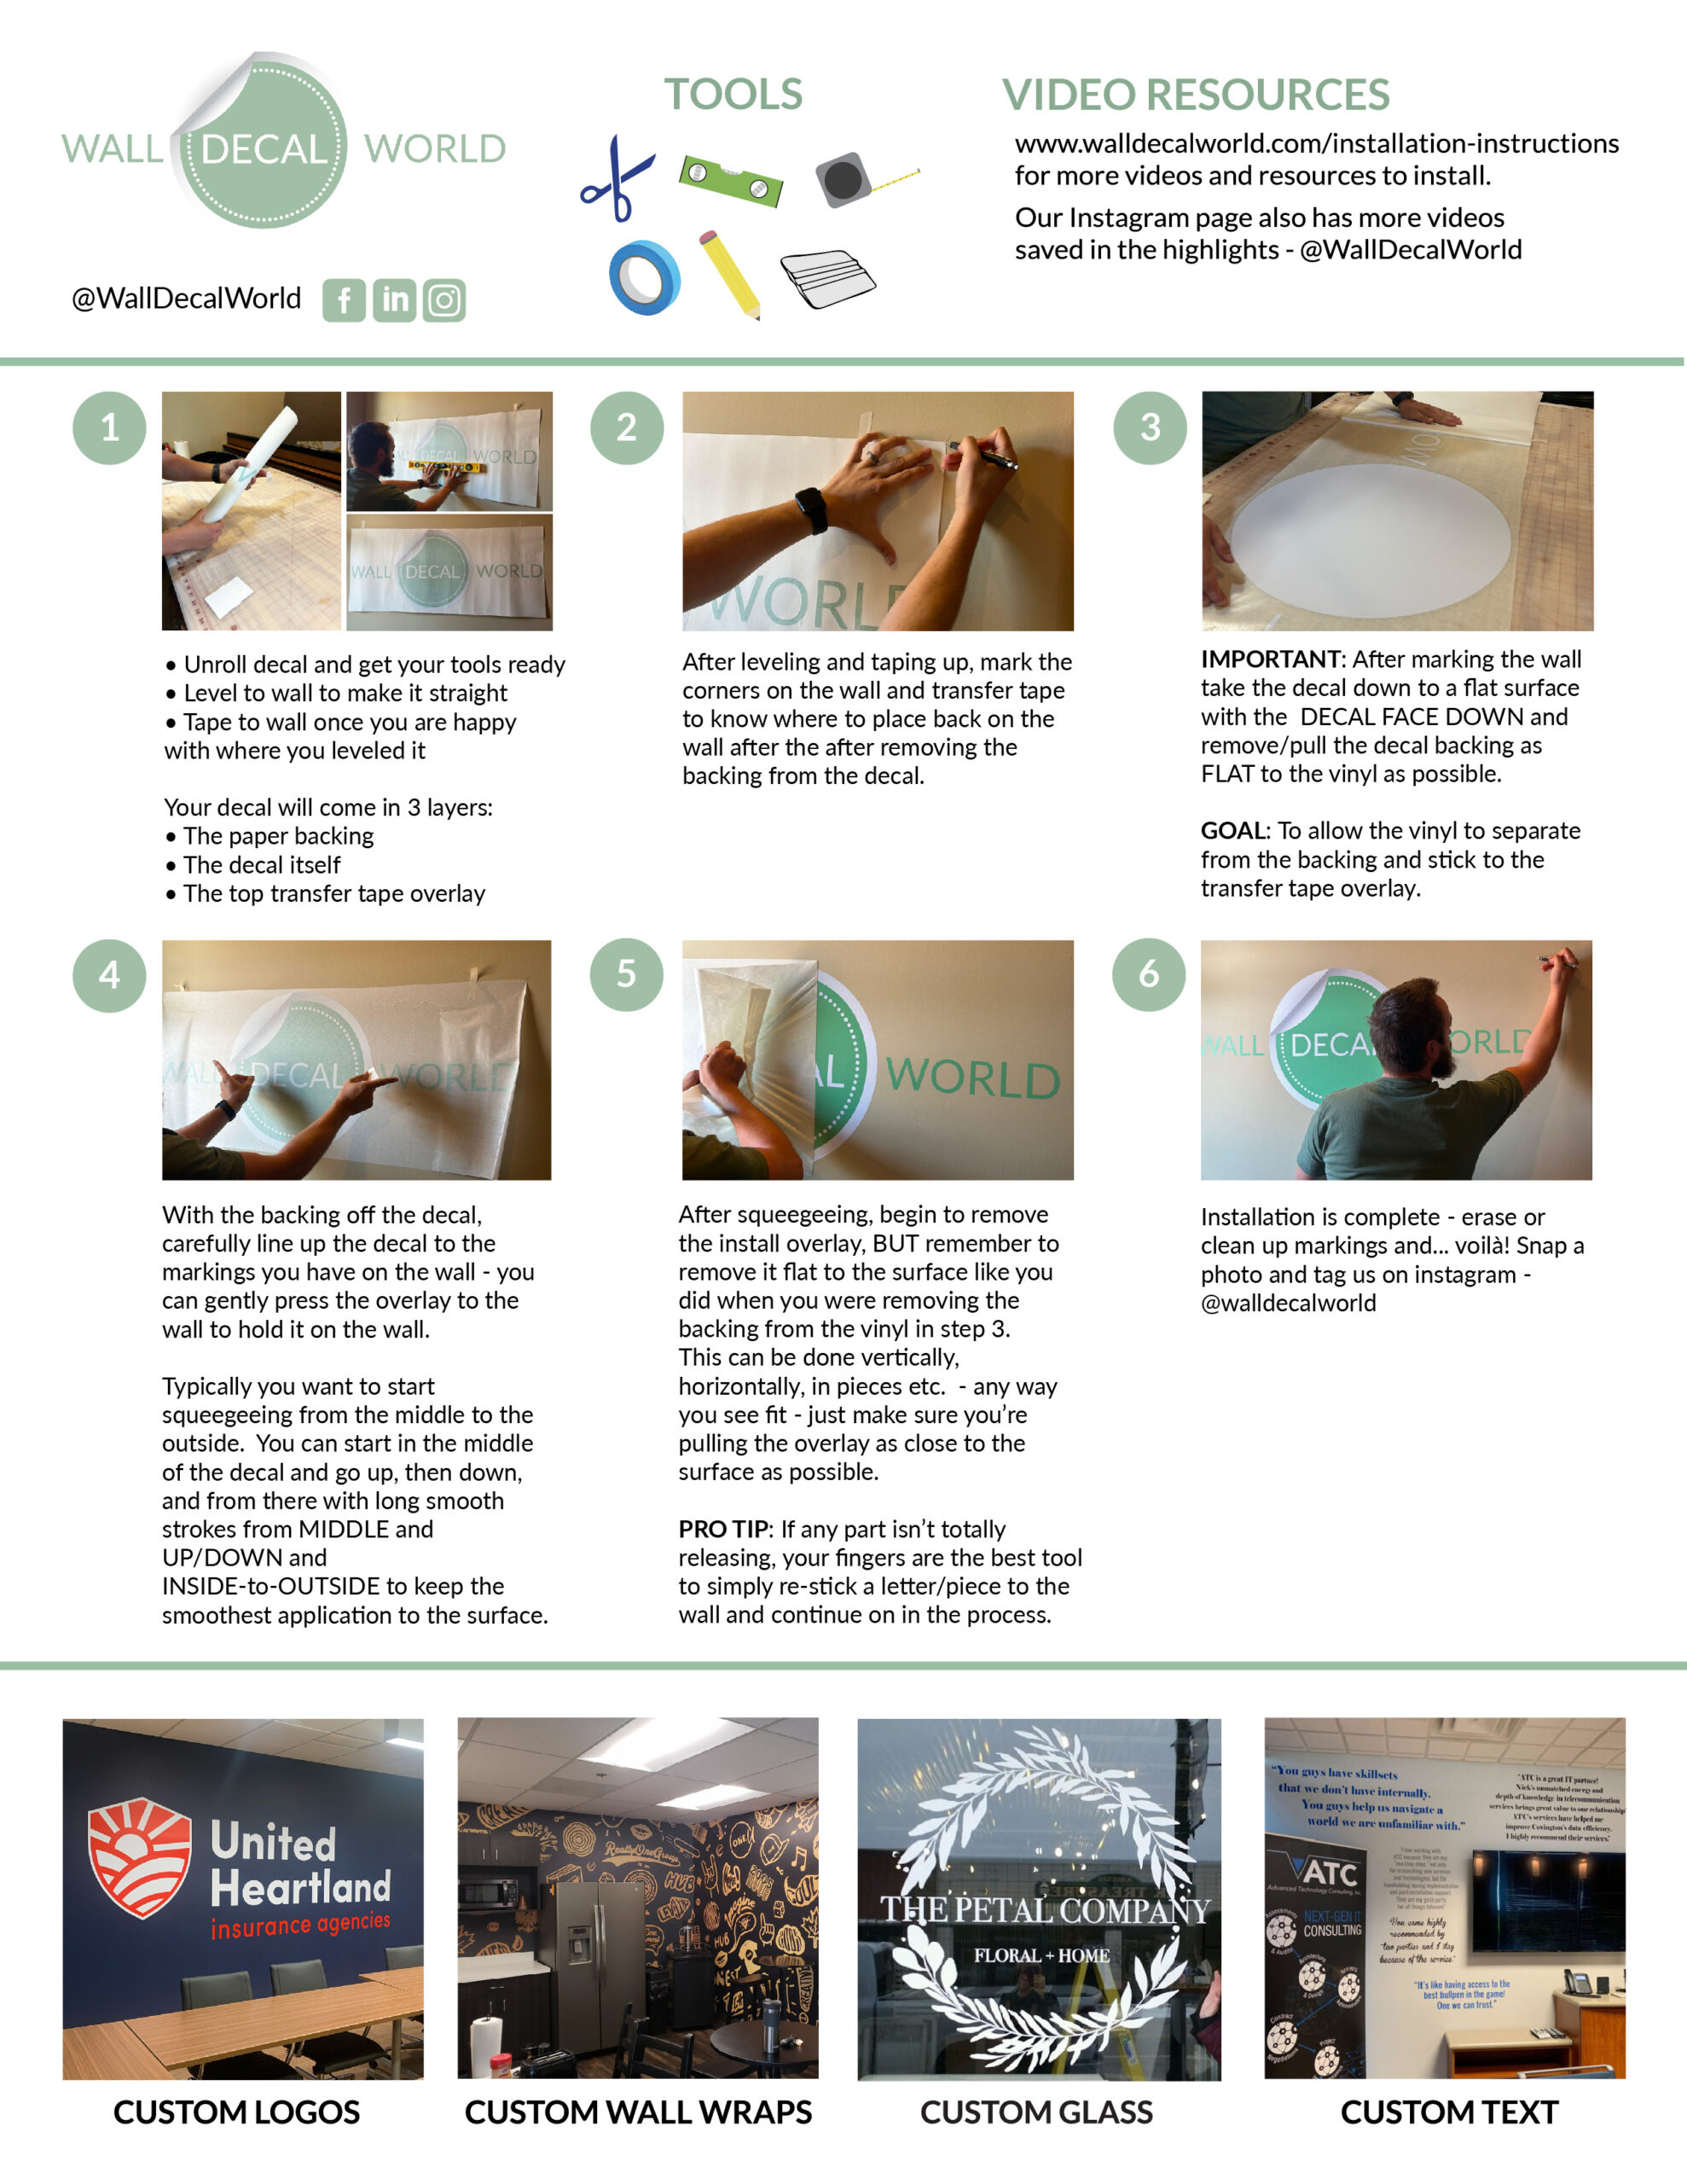
How to Install your New Decal
Your decal has arrived—now it’s time to bring your space to life!
- View Photo Instructions: Print or enlarge for easy reference.
- Watch Video Tutorials: See the full process step-by-step.
- More on Social: Visit our Instagram @walldecalworld for more examples.
Self-Install (most popular option)
Decals up to 10 ft (or bigger if you are comfortable!) are designed for self-install, and even larger pieces can be tackled with the right setup. Here’s what you need:
Tools You’ll Need
- Squeegee: Included with every order (a credit card works too)
- Level: Make sure your design is straight (don’t rely on the paper backing)
- Masking or Painter’s Tape: Holds your decal in place while aligning
- Measuring Tape: Helps center or space your decal properly
- Damp Cloth: Clean your wall before starting
Professional Install
For extra-large decals or full wall wraps, we recommend hiring a professional if you are not comfortable. We’re happy to connect you with a certified expert through the United Application Standards Group (UASG). We find most professional installers have a minimum of around $450 to come out (can be more the larger your piece is).
Printable Instructions
Installation Videos
We have resources on our instagram highlights and youtube page to visually help you with install.
Die-cut (heavy lettering) installation
Simple Oval Logo Installation
Simple Die-cut Logo Installation
Wall Wrap Installation (we do not own this video)
Etched Glass Installation (we do not own this video)

